Pet photo to STL
A pet relief captures the visible pose and outline of one photograph. Choose a clear head-and-shoulders image with both ears in frame; a silhouette that reads at thumbnail size is a useful starting point.
Make a pet keepsake plaque
- Long side (mm)
- 100 mm
- Relief depth (mm)
- 6 mm
- Base thickness (mm)
- 2 mm
- Surface direction
- Raised
Starting values for a design study. Check the generated file before making it.
An image. A relief. Your next project.
AI-created source images, converted with Meshy Relief via FAL. These are actual model renders; no physical prints or carvings have been tested.
A familiar face, made into a keepsake
A front-facing golden retriever on a clean background gives the muzzle, ears and chest fur space to become a keepsake plaque.
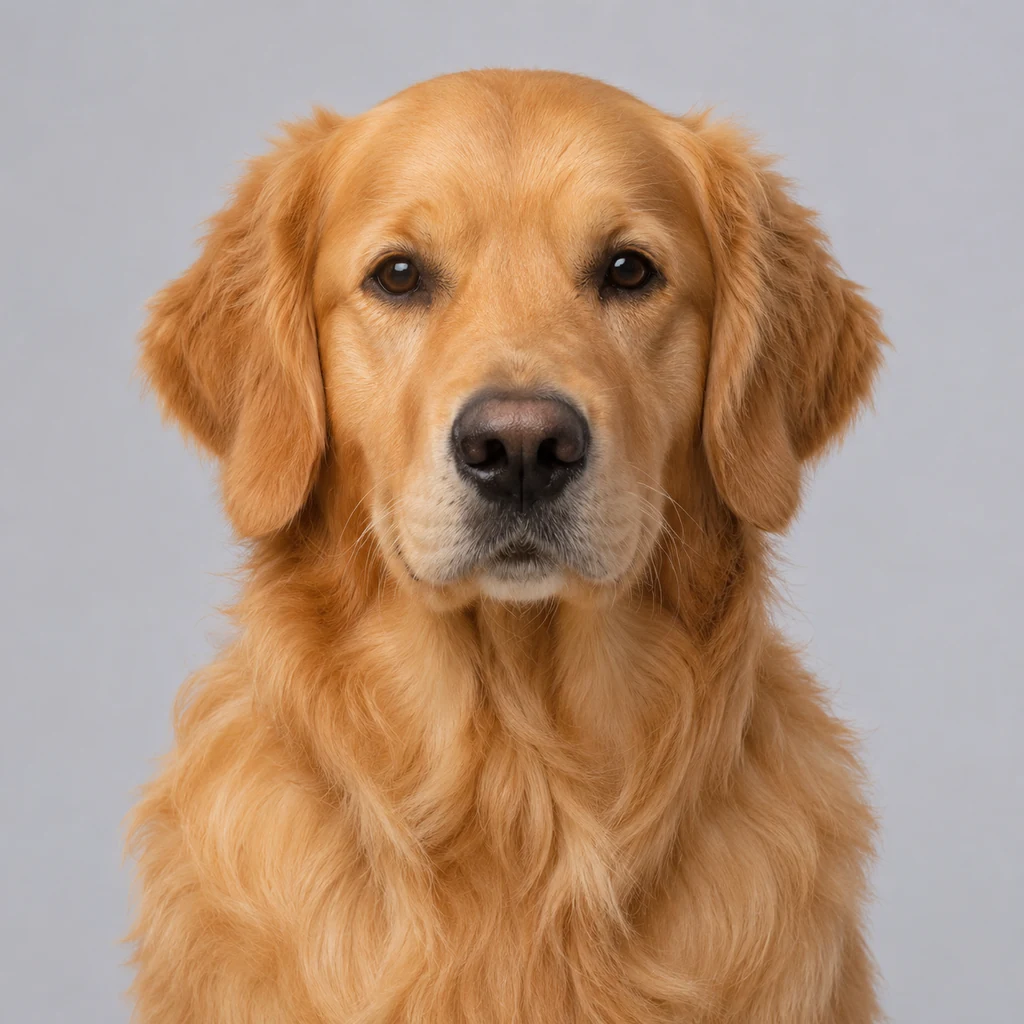
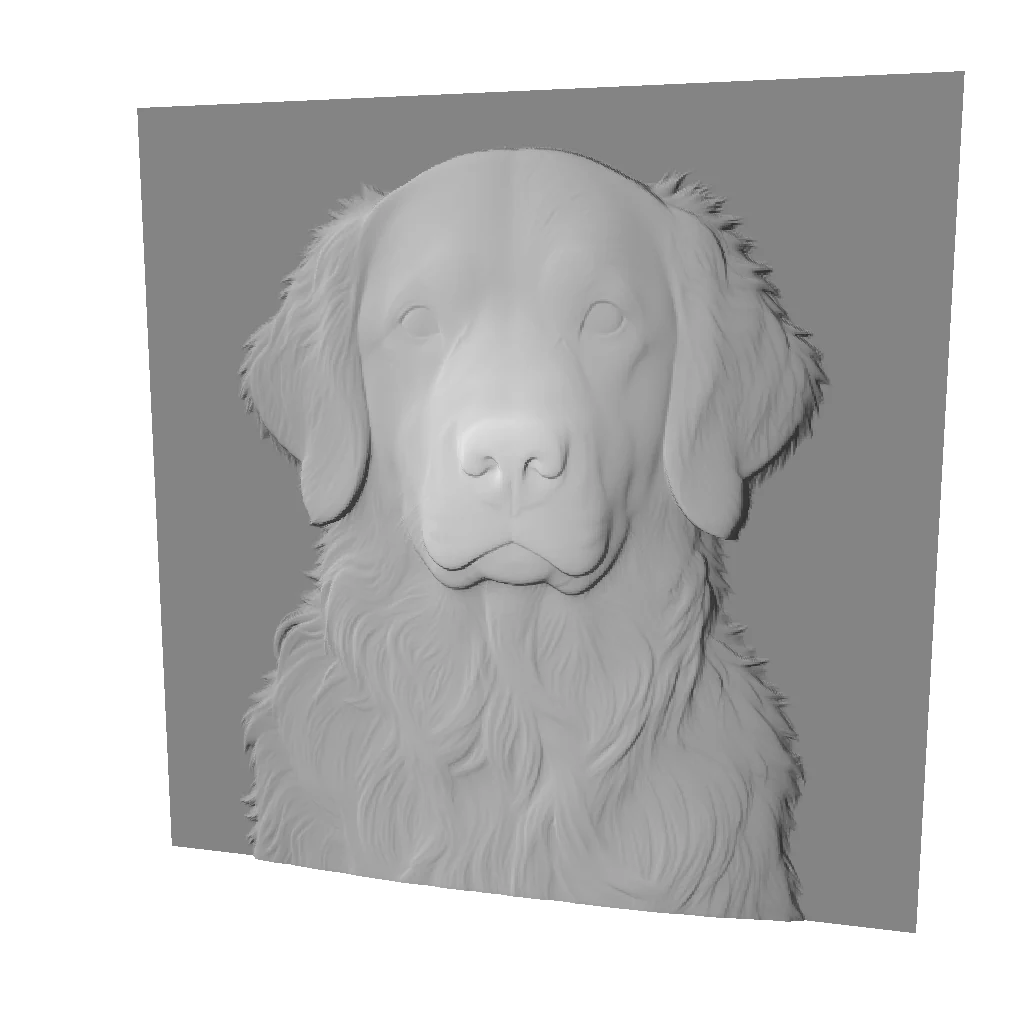
The model retains the muzzle and raised fur detail. Check fine fur in your slicer; this is a shallow relief, not a full pet statue.
Explore this workflow- Longest side
- 100 mm
- Relief depth
- 6 mm
- Base
- 2 mm
Embossed · base retained · no bend · mesh 512
Choose this kind of image
One pet, complete ears, clear eyes and muzzle, with visible separation between fur and background.
Choose another image if…
Cage bars, a leash across the face, motion blur, or overlapping animals.
Keep the ears. Simplify the background.
Crop out furniture and other animals while leaving space around ears and whiskers. Avoid a dark pet against an equally dark background; the model must infer those boundaries.
Do not expect individual whiskers to survive printing. Judge the overall face and silhouette before adding resolution.
Start with a stable base
Try a 100 mm long side, 6 mm depth and 2 mm base as an initial design study. These are starting parameters, not a tested print profile. Thin ears and hanging edges need inspection.
Before making a memorial gift
Check the eyes, muzzle and paw shapes in the GLB preview. Compare with the original photo. A photograph cannot establish exact head geometry, and a meaningful keepsake may need a revised crop.
Before generating again
- Ears and fur merge with the background
- Return to the crop step, enlarge the subject and remove the surrounding background with the brush. Avoid repeatedly increasing contrast around fur.
- Whiskers become isolated slivers
- Keep a continuous base and inspect the layer preview. Remove isolated thin lines before generating again if needed.
Questions about this workflow
Can one photo produce a complete pet statue?
This tool creates a relief from the photographed view, not a complete statue. The back and hidden parts have no photographic evidence and cannot be treated as an accurate reconstruction.
Should I always brighten black fur?
No. First check whether the eyes, muzzle and ears are distinguishable. A small brightness adjustment can help inspection, but excessive brightening loses detail. If the background is equally dark, another photo is often more useful.
Can I send the file straight to a print shop?
You can download the STL for a print shop to assess, together with your intended dimensions in millimeters. Ask them to inspect thin edges, the base and support needs; a successful export is not print validation.